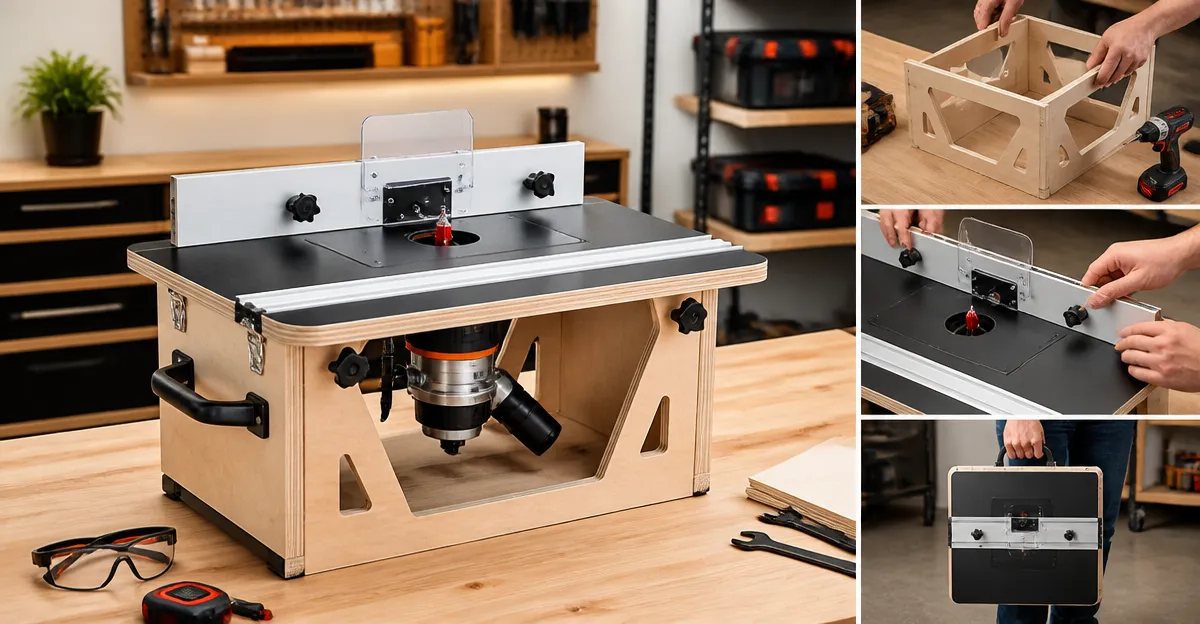
How to Build a Space-Saving Portable Router Table for Tiny Workspaces: Plans & Practical Tips
Introduction
One often discovers that a full‑size router table consumes valuable floor space, yet the precision it provides remains essential for quality woodworking. This guide teaches the reader how to design and assemble a compact, portable router table that fits into a cramped garage or a modest home‑shop corner. By following the outlined steps, one will gain a functional work surface, repeatable routing accuracy, and a solution that can be folded away when not in use. The instructions incorporate real‑world product recommendations, ensuring the final table is both affordable and reliable.
What You'll Need
- Portable router table base – consider the Bosch Router Table (price $174.99, rating 4.4/5 from 1,304 reviews).
- Alternative benchtop table – the SKIL Router Table (price $139.00, rating 4.4/5 from 490 reviews) provides a lighter‑weight option.
- Compact trim router table – the Rockler Trim Router Table (price $92.99, rating 4/5 from 410 reviews) works well for occasional use.
- Heavy‑duty steel stand – the POWERTEC Router Table (price $239.99, rating 4.5/5 from 345 reviews) offers maximum stability.
- General hardware: 2‑inch wood screws, leveling feet, wood for a rear brace, and a small piece of plywood for the work surface.
- Safety gear: eye protection, hearing protection, and a dust mask.
Step 1: Define the Layout and Dimensions
One should begin by measuring the available floor area and determining the maximum width and depth the table may occupy. For a typical tiny workshop, a footprint of 24 inches by 16 inches provides sufficient routing space while leaving room for a workbench. Sketch the layout on paper, indicating the position of the router mount, fence, and any storage compartments. This plan will guide the cut list and ensure that the final assembly folds neatly against a wall when not in use.
Step 2: Gather Materials and Prepare the Work Surface
Cut a 24" x 16" piece of ¾‑inch MDF to serve as the tabletop; the MDF core offers a smooth, low‑friction surface that resists vibration. Apply a high‑pressure laminate sheet if a durable finish is desired, mirroring the surface used on the POWERTEC model. Next, cut a rear brace from a 2‑inch thick piece of oak or pine, matching the tabletop width. The brace will be clamped to a workbench or wall, providing the necessary rigidity for routing heavier stock.
When selecting a pre‑built router table base, the Bosch Router Table stands out because its Easy Click mounting system eliminates the need for complex leveling. Its laminated MDF top aligns with the custom tabletop, and the tall fence with dual featherboards adds immediate control. The price of $174.99 and strong 4.4‑star rating make it a cost‑effective foundation for the project.
Step 3: Assemble the Base and Attach the Rear Brace
Unfold the Bosch base and position the rear brace against the folding legs. Secure the brace using 2‑inch wood screws through the pre‑drilled holes in the base’s storage compartments. This creates a sturdy “U” shape that can be clamped to a bench or wall studs. Ensure the brace sits flush with the tabletop; any gaps will cause chatter during routing.
If a lighter option is preferred, the SKIL Router Table offers an aluminum mounting plate and a quick‑release clamp that fits most routers. Its 24‑inch fence and dual‑sided bit storage reduce the need for additional accessories, saving both space and cost. The SKIL model is priced at $139.00 and carries a comparable 4.4‑star rating.
Step 4: Install the Router Mount and Bit‑Height Gauge
Place the router on the Easy Click mount, aligning the router’s shaft with the pre‑drilled hole in the tabletop. Tighten the mount until the router sits securely; the system requires no additional leveling because the base is already level. Attach the bit‑height gauge provided with the Bosch table; this tool simplifies setting the cutting depth and improves repeatability, a feature highlighted in the product description.
For users who own a trim router, the Rockler Trim Router Table can be adapted by drilling a custom mounting plate into the MDF surface. Although it lacks a built‑in height gauge, a separate gauge can be purchased separately, offering flexibility for occasional projects. The Rockler table’s price of $92.99 makes it an attractive entry‑level choice.
Step 5: Fit the Fence, Featherboards, and Starter Pin
Slide the adjustable fence into the slot on the base and lock it using the provided knobs. The tall fence on the Bosch table accommodates taller workpieces, while the dual featherboards clamp the workpiece against the fence, reducing kickback. Install the starter pin near the router bit; this pin acts as a pivot point for guiding curved cuts, a benefit emphasized in the Bosch product’s customer feedback.
The POWERTEC Router Table includes an aluminum fence with a built‑in bit guard, flip stop, and integrated dust port. Although more expensive at $239.99, its comprehensive feature set eliminates the need for aftermarket accessories, making it ideal for professionals who demand precision and safety.
Step 6: Add Portable Storage and Folding Mechanisms
Utilize the onboard storage compartments on the Bosch base to keep spare router bits, reducing clutter on the workbench. If additional storage is required, attach a small wall‑mounted rack or a magnetic strip for metal accessories. Fold the legs of the base upward and secure them with the built‑in latch; the compact profile now fits beneath a standard workbench when not in use.
For the SKIL model, the integrated dual‑sided bit storage provides a quick‑latch solution, keeping bits organized without extra shelves. This design is especially useful in tiny workshops where every cubic inch counts.
Step 7: Test, Level, and Fine‑Tune the Table
Place a test piece of scrap wood on the tabletop and run a shallow cut to verify the router’s height and fence alignment. Adjust the leveling screws on the base until the tabletop reads level with a spirit level. Fine‑tune the featherboard pressure to eliminate any movement of the workpiece during the cut.
Finally, run a dust collection hose into the built‑in dust port (available on the POWERTEC and Rockler tables) to maintain a clean work environment. The dust port’s 2‑1/2" diameter matches most shop vacs, ensuring efficient debris capture.
Tips & Pro Tips
- When folding the table, always lock the legs securely to prevent accidental collapse.
- Use a sacrificial piece of plywood under the MDF surface if you anticipate heavy impact work; this protects the laminate from gouges.
- Install a small LED strip under the tabletop edge for better visibility in dim workshops.
- Periodically check the router mount bolts for tightness; vibration can loosen them over time.
- If the table wobbles on uneven floors, add adjustable rubber feet to the rear brace.
Troubleshooting
| Problem | Possible Cause | Solution |
|---|---|---|
| Router bit chatter | Uneven tabletop or loose mount | Re‑level the tabletop using the base’s leveling screws; tighten the Easy Click mount. |
| Workpiece drifting | Featherboards not engaged | Adjust featherboard pressure and ensure they contact the workpiece on both sides of the fence. |
| Dust collection ineffective | Dust port blocked | Clear the port and verify the hose diameter matches the 2‑1/2" opening. |
Conclusion
One now possesses a fully functional, space‑saving portable router table that can be assembled, used, and stored within minutes. By leveraging the Bosch Router Table’s Easy Click mount, the SKIL model’s integrated storage, or the POWERTEC table’s comprehensive fence system, the builder can select the solution that best fits budget and workspace constraints. The guide has covered design, material preparation, assembly, and fine‑tuning, empowering the reader to achieve professional‑grade routing results even in the smallest of workshops.
Products Mentioned in This Guide
Frequently Asked Questions
What are the main benefits of a portable router table for tiny workspaces?
It saves floor space, can be folded away when not in use, and still provides the precision and repeatability of a full‑size table.
Which router table base is recommended for a budget‑friendly portable setup?
The Bosch Router Table (about $175) is a popular choice with a 4.4‑star rating and solid build quality.
Is there a lighter‑weight alternative to the Bosch base?
Yes, the SKIL Router Table costs around $139 and offers a lighter design while maintaining good performance.
What basic tools and materials are needed to build the table?
You’ll need the portable router base, a sturdy benchtop surface, clamps, screws, and basic hand tools like a drill and screwdriver.
Can the portable router table be used for both edge‑routing and dado work?
Absolutely; with the right insert plate and accessories, the compact table can handle edge‑routing, dado cuts, and most standard router tasks.